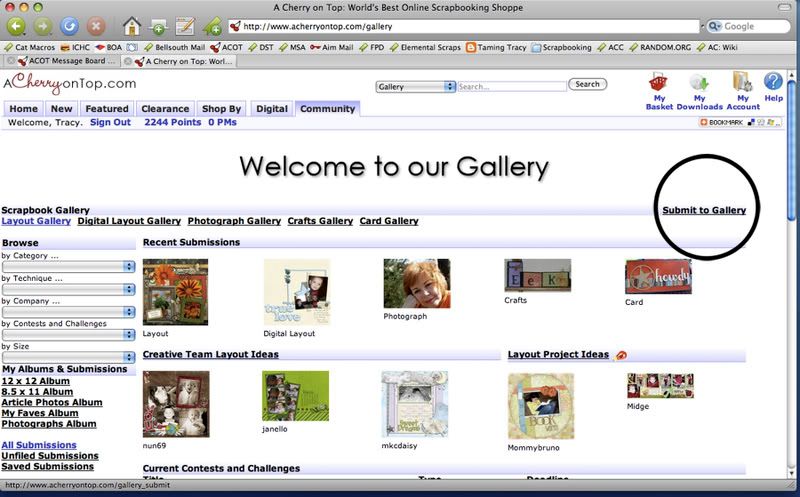
Welcome! After clicking on Gallery under the Community tab, you will be brought here to the main page. I've circled the Submit To Gallery link for you in the picture above. Click here to submit your work. (For more details about the main gallery screen, please see Navigating Our Gallery)
The Submissions Screen

In the first part of the submissions screen, you will chose the Type of project. Clicking here will give you a drop down box with the project categories: Layout, Digital Layout, Craft, Card & Photograph. Select the appropriate one for your project.
Next you will pick the size. As you can see, the default is 12x12, but by clicking here you will again be presented with a drop down box of common layout and photo sizes. Select the appropriate one for your project.
The next box is the optional Reveal Date. Setting a Reveal Date will keep your project 'hidden' until the date you select. Hidden projects have a blue lock on them in your personal gallery. This is great for submitting Design Team projects for future product releases. To set a Reveal Date either type in the date, or click on the calendar for a pop up box.
Next is the Privacy button. If you wish to keep your project from being publicly viewed, just click Private. Private projects will have a yellow lock next to them in your personal gallery.
The next section concerns albums. You can organize all of the projects in your personal gallery by creating albums. For example, I have albums for 12x12 layouts, 8.5x11 layouts, photos, etc. Once you have created an album, it will appear in a drop down box. If you wish to create a new album, you can do so in this section. This is purely optional and you can leave that box blank if you wish. More information about albums is found in the Navigating Our Gallery thread.
After that you have a place to enter a title for your project (required) and a box for a description. Here you can tell us what products you used, journaling you've included, or anything else you'd like us to know about your submission.
Following that is the Images section. Here's where you will be adding the scans or photographs of your submission. Click on Browse and a pop up box for your computer will appear. Navigate to where your project is, and click Open. You can do this multiple times for 2 page layouts, mini albums or any other submissions that have more than photo. You will also have the option of adding a Caption for each file you select. Once you've selected all the files for your submission, click Add Images. All your files will now upload to our webiste.
The following steps are all optional. If you wish to skip this portion, merely go to the bottom of the screen and click Submit.
Here's the middle portion of the Submissions screen.
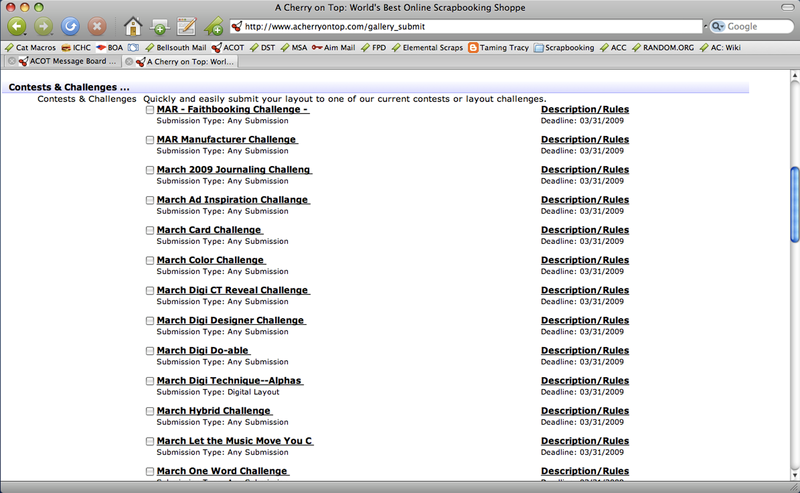
If you're participating in one of our Challenges or Contests, just click on the appropriate box. This ensures that your submission is filed into the appropriate gallery and is then elgible for points and prizes. You can see more about each Challenge/Contest by clicking on the link for Description/Rules.
Categories and Products
The next portion of our submissions screen allows you to categorize your project. This makes it easy for other members to find your projects based on Category, Technique or Company. More information on this section of our submissions screen can be found in the Navigating Our Gallery thread.
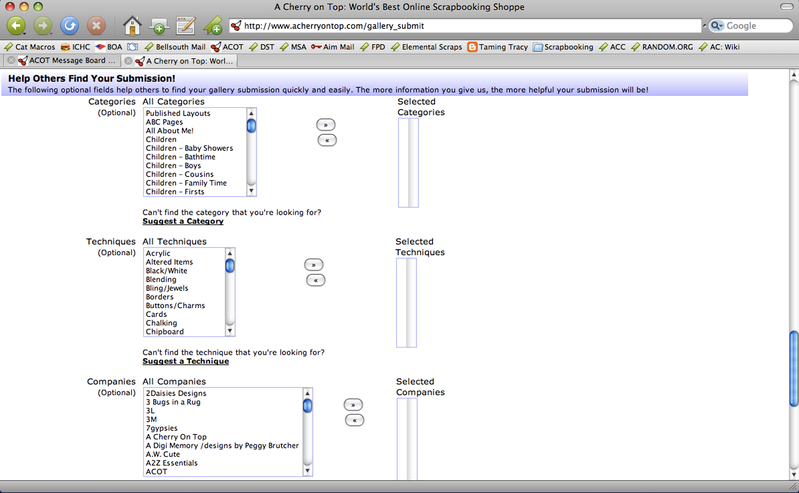
Just select the categories you'd like to use in the lists on the left. Click the arrow keys in the middle of the screen to add or remove them from the lists.
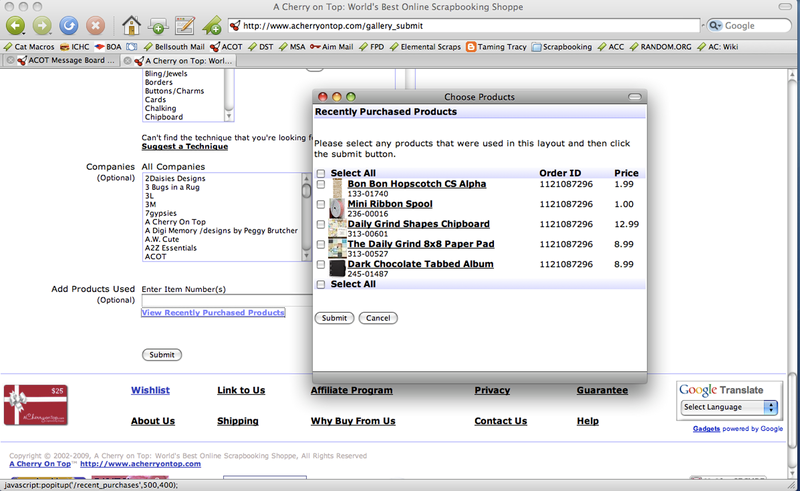
Our final section of the submissions screen will link your project right to the products you've used in our shop. Many members find it helpful to be able to go right from your project to the products you've used. To select items you've purchased from ACOT, just click on the View Recently Purchased Products link to get a pop up box with the list of your purchases. Click on the appropriate products and then click Submit. These items will now show as thumbnails on your submitted project. Your project will appear in the shop under the Layout Ideas tab for each product linked, as well as being in the Layout Project Ideas Gallery. Items linked to the shop will have a red lightbulb icon next to them in the gallery.
Click on Submit and your submission is done. We look forward to seeing all your great projects in our gallery!